|
| |
|
| |
Spherical photographic environment |
|
| |
A project based on a spherical photographic environment allows you to place your 3D models into photographically acquired shelving from an actual existing store. Your packaging models and products can be seamlessly integrated with existing photographic products already on shelf.
Store Visualizer comes with templates for 5 spherical environments that you can use to base your first projects on. Additional environments can be created according to your specifications, in a location of your choice. Please contact your sales representative for more information about this service. |
|
| |
|
|
| |
|
|
| |
Step 1: Opening a spherical project |
|
| |
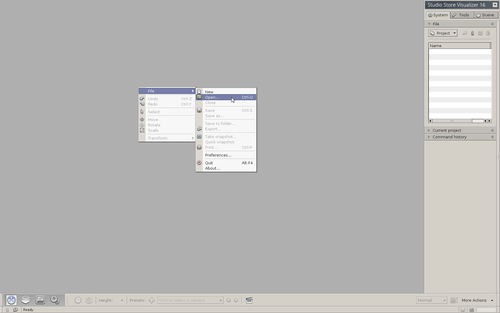
Right click anywhere on the grey area to open the main contextual menu and select File > Open. |
| |
|
| |
|
| |
|
| |
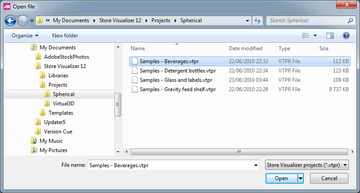
Open the Spherical folder, select a sample project and click Open to load it. |
| |
| |
 |
Store Visualizer 18 comes with a number of sample templates and projects. Templates are empty retail environments, where you have plenty shelf space to place products the way you like. Three example templates are provided.
Sample projects already have products placed into them. We prepared four complete projects for you, which you can use to quickly take a look at the features Store Visualizer offers:
* Sample - Beverages contains corrugated trays with aluminum cans and juice carton packs. Try moving the trays and observe the physics at work. Or select the juice packs and try out the array feature (see chapter Filling shelves).
* Sample - Detergent bottles is a simple example of plastic detergent bottles on a shelf. This is a good basic project for you to get used to manipulating products in the virtual retail environment.
* Sample - Glass and labels is a project showing some advanced visual effects offered by Store Visualizer. It features champagne and wine glass bottles with multi-layer labels, reflections and embossing.
* Sample - Gravity feed shelf uses physics to simulate a gravity feed shelving system with aluminum cans. After loading this project, start the physics (see chapter Physics) and remove the foremost products to see it in action !
|
| |
|
|
|
| |
|
| |
Step 3: Finding your way through the environment |
|
| |
In a spherical photographic environment the camera is fixed and you will not be able to move along the aisles. You may however zoom in and out of the products that you placed on shelf. |
|
| |
|
|
| |
| |
 |
| |
|
01 |
02 |
03 |
|
|
| |
|
| |
01. Enable the Navigation toolbar by clicking on the navigation icon located left on the bottom panel bar. |
| |
|
| |
02. Click the Free look icon to enable freelook mode. You may also press the spacebar instead.
The mouse cursor and the toolbar will disappear and freelook mode is enabled. |
| |
| |
|
|
|
| |
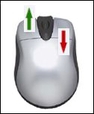 |
By using your mouse or keyboard, you may now navigate within the photographic environment:
* Click and hold the left button or press the arrow up key to move FORWARDS
* Click and hold the right button or press the arrow down key to move BACKWARDS |
|
| |
 |
|
|
| |
|
|
|
| |
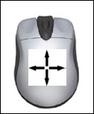 |
* Move your mouse upwards in order to look up
* Move your mouse downwards in order to look down
* Move your mouse to the left in order to turn to the left
* Move your mouse to the right in order to turn to the right |
|
| |
|
|
|
|
| |
|
| |
03. You may change the speed of your movements in the spherical environment using the speed selector button. |
| |
|
| |
Finally, press the spacebar again to exit freelook mode. |
| |
|
| |
|
| |
|
| |
|
| |
|
|
|
© Copyright 2018 VTales graphics - All rights reserved.
|