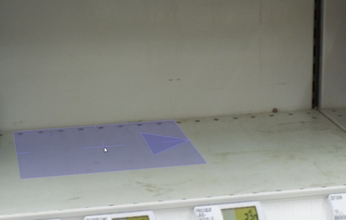
Once you have selected a surface and starting point, press and hold the left mouse button. When moving the mouse while holding the left button, an outline will appear. This outline defines the volume of space used to arrange the objects on the surface. Move the mouse until you are satisfied with the size of the filling volume.
Release the mouse button in order to finish the creation of the array. The blue surface positioning cursor will reappear and you can continue creating additional arrays. Click the Create an object array button again (or press ‘f’) to leave the array creation mode.
You can access and modify the properties of any selected array through the Object array dialog.
You can access the asrray settings dialog at any time by opening the More actions menu on the object toolbar and selecting Array settings. You can also press the Shift-F keyboard shortcut.
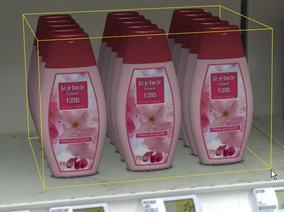
Note: By default, object arrays are not subject to physical simulation (see next chapter). In order to apply physics to the object created by the array, right click on an object belonging to the array and select the Break to objects option. |