 |
| |
|
| |
This page focuses on the product manipulation mode. This mode is used in both spherical and virtual 3D projects for manipulating and interacting with products. A product is defined as any 3D object that is not part of the shelving, store furniture or larger scale construction structure of the store.
Most object manipulation functions shown here (such as movement or creation) are also available in other construction modes. Page 3 describes all available construction modes used to build your store. |
|
| |
|
|
| |
Step 1: Loading a library of 3D products |
|
| |
| |
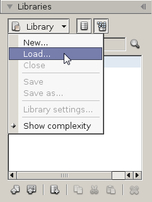 |
Open the Tools sidebar and the Library panel will appear. A library is a collection of 3D models that can be placed on shelf within the environment. It is a convenient way to organize your products by category, customer or any other criteria you may need. It also allows you to easily share 3D products with other people.
Click on the Library button and select Load. |
|
|
| |
| |
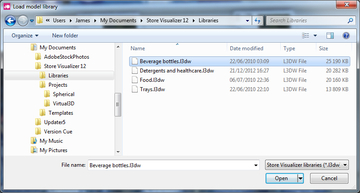 |
Select one of the provided example libraries and click on Open.
* Beverage Bottles contains glass and plastic bottles of all kinds, from Champagne to soft drinks, with and without paper labels.
* Detergents and Healthcare adds a selection of plastic and aluminum packaging for laundry detergents, shampoo, skin lotions and more.
* Food contains various types of food packaging, such as cartons, flexibles, aluminum cans and plastic bottles.
* Sample Shelves contains example frames and shelves. You can use this library to create your shelving and aisles in a 3D environment.
Please note that 3D shelf models can not be used in a spherical photographic environment.
* Trays has a collection of basic corrugated carton trays. |
|
|
| |
|
| |
| |
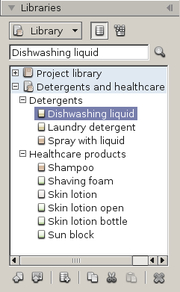  |
The selected library will load and appear in the Library panel. Double click on the library name to open it and access its contents.
A library can contain folders. They are used to organize your 3D products into sub-categories. You can easily recognize folders by the plus sign in front of their names. Double click on a folder to open it.
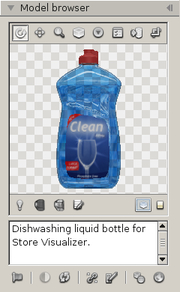
Folders contain the 3D products you will place into the retail environment. Click on a product model to highlight it. This will select it for subsequent operations (such as placement) and make it appear in the Model browser panel. |
|
|
| |
|
| |
|
| |
Step 2: Placement of products into an environment |
|
| |
You can now start placing the selected product onto the shelves. |
| |
|
|
| |
Creating an object |
|
| |
|
| |
| |
 |
| |
|
01 |
02 |
03 |
|
| |
|
|
|
|
|
|
| |
01. Enable the Object placement toolbar by clicking on the Object control icon located on the bottom panel bar.
Every new object is derived from the currently selected library model. Make sure you have a product model selected, as described in step 1.
02. The product manipulation mode must be activated.
03. On the object placement toolbar, enable the placement mode by clicking on the Create a new object icon. |
|
| |
 |
Move the mouse pointer to the surface you would like to place the object onto, for example over a shelf. If the placement is possible, a symbolic representation of the object will appear. You can use the mouse wheel to change the orientation of the object on the placement surface.
Once you have determinated the position and orientation of the placement area, press the left mouse button to create a new instance of the model at the selected location.
Note: You can place more than one object by repeating the last two steps as many times as you need. In order to place a different model, simply select the new one in the library panel, as described in step 1.
When you have finished placing objects, press the Create a new object icon again in order to disable the placement mode. |
|
| |
|
|
|
|
| |
|
|
| |
Interracting with the objects |
|
| |
|
| |
| |
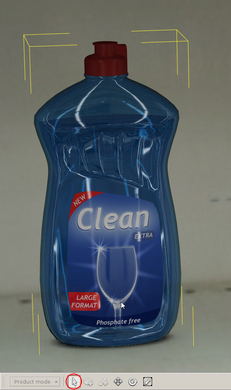 |
Selecting an object
On the object placement toolbar, enable the selection mode by clicking on the Select objects icon. Position the mouse pointer over the object you want to select, and press the left mouse button.
Note: By default, selected objects are shown with an open yellow box around them.
You can select or unselect several objects at once by using a selection area. Clicking the left mouse button, and dragging the mouse while holding the button down will create a selection rectangle. All objects within the area will be selected or unselected.
Holding the Ctrl key while clicking the left mouse button will add the object to the current selection.
Holding the Alt key while clicking the left mouse button will remove the object from the current selection. |
|
| |
|
|
|
|
| |
|
| |
| |
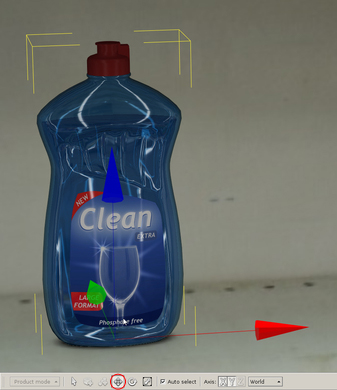 |
Moving an object
Enable movement mode by clicking on the Move selection icon.
Movement is started by clicking onto a selected object with the left mouse button, and moving the mouse while holding the button.
If you press the Ctrl key while still holding the left mouse button, the object will move along the direction perpendicular to the selected axes. For example, if the X and Y axes are selected (the default), then the object will move on a horizontal plane. If you press Ctrl, the direction will toggle to the Z axis, and you may move the object up and down.
Pressing the Shift key before clicking the left mouse button will create a duplicate of the selected object. |
|
| |
|
|
|
|
| |
|
| |
| |
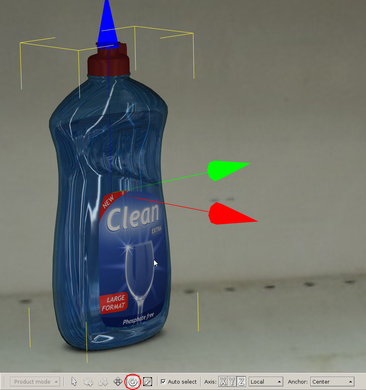 |
Rotating an object
Enable rotation mode by clicking on the Rotate selection icon.
Rotation is started by clicking onto a selected object with the left mouse button, and moving the mouse while holding the button.
Pressing the Ctrl key while holding the left mouse button will increase the precision of the rotation.
| |
| |
|
|
|
|
| |
|
|
| |
|
|
| |
|
| |
|
|
|
© Copyright 2018 VTales graphics - All rights reserved.
|
