|
| |
|
| |
Virtual 3D environment |
|
| |
A virtual 3D environment gives you complete control over the design and the layout of your 3D virtual retail space. Using the store and shelf editing features of Store Visualizer, you can easily add shelving, create aisles, fill them with products and customize the look of your store in real time.
A project based on a virtual 3D environment allows full freedom of movement and interaction of both camera and 3D models within the simulated area. |
|
| |
|
|
| |
|
|
| |
Step 1: Create a new virtual store from a template |
|
| |
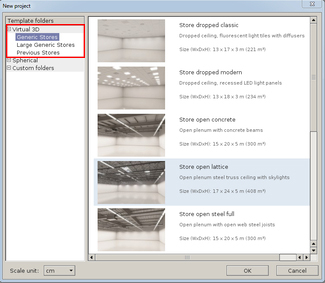
Right click anywhere on the grey area to open the main contextual menu and select File > New. The New project dialog window will appear. |
| |
| |
|
|
|
| |
|
Click on the Virtual 3D folder.
A list of available virtual templates will appear.
Select a template from the list and press OK to open it. |
|
| |
|
| |
| |
|
An empty project will be created from the template. |
|
| |
|
|
| |
|
|
| |
Step 2: Navigating through a virtual 3D environment |
|
| |
|
|
| |
| |
 |
| |
|
01 |
02 |
03 |
|
|
| |
|
| |
01. Enable the Navigation toolbar by clicking on the navigation icon located left on the bottom panel bar. |
| |
|
| |
02. Click the Free look icon to enable free look mode. You may also press the spacebar instead.
The mouse cursor will disappear and freelook mode is enabled. |
| |
| |
|
|
|
| |
 |
By using your mouse, you may now navigate within the 3D environment:
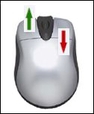
* Click and hold the left mouse button or press the arrow up key to move FORWARDS
* Click and hold the right mouse button or press the arrow down key to move BACKWARDS |
|
| |
 |
* Press the right arrow key to move sideways to the RIGHT
* Press the left arrow key to move sideways to the LEFT |
|
| |
|
|
|
| |
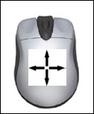 |
* Move your mouse upwards in order to look up
* Move your mouse downwards in order to look down
* Move your mouse to the left in order to turn to the left
* Move your mouse to the right in order to turn to the right |
|
| |
|
|
|
|
| |
|
| |
03. You may change the speed of your movements through the 3D environment using the speed selector button. |
| |
|
| |
Finally, press the spacebar again to exit free look mode. |
| |
|
| |
|
|
| |
Step 3: Construction modes |
|
| |
Store Visualizer exposes three construction modes: product manipulation, shelf creation and store design. Each mode targets a specific process in the work flow of creating the layout and shelving of a retail space and filling it up with products. |
|
| |
|
| |
| |
 |
| |
|
01 |
02 |
03 |
|
|
| |
01. Enable the Object placement toolbar by clicking on the Object control icon located left on the bottom panel bar. |
| |
02. Click on the Change manipulation mode button and enable the desired construction mode. |
| |
Store design mode: In this mode you may easily create and manipulate larger shelving units as a whole, creating aisles and doing larger scale manipulation of the store layout. |
| |
| |
 |
Enter Store design mode by pressing the button on the toolbar or by selecting a shelf frame model in the library and enabling creation mode.
You may now select and manipulate large shelving units as combined blocks. An optional snapping mode is available for quickly and accurately aligning units and creating aisles. When selecting a unit, all shelves and products positioned onto the shelves are automatically selected and will be moved along.
The snapping can be toggled with the Snap frames to frames option in the More actions menu.
|
| |
|
|
|
| |
Shelf creation mode: This mode is mainly used to quickly modify the shelf configuration within existing units. You can quickly access individual shelves, move them and create new ones. |
| |
| |
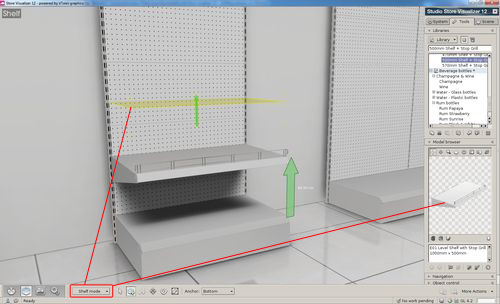 |
Enter Shelf mode by pressing the button on the toolbar or by selecting a shelf model in the library and enabling creation mode.
This mode allows the manipulation of individual shelves within a unit. A special shelf snap is available for extremely easy creation and positioning of shelves. Products placed on a shelf can be automatically moved with the shelf without additional selection.
|
| |
|
|
|
| |
Product manipulation mode: This is the standard manipulation mode active when you start Store Visualizer. It focuses on the manipulation of products on shelves. You will use this mode to place and interact with products in your store and for physical simulation. |
| |
| |
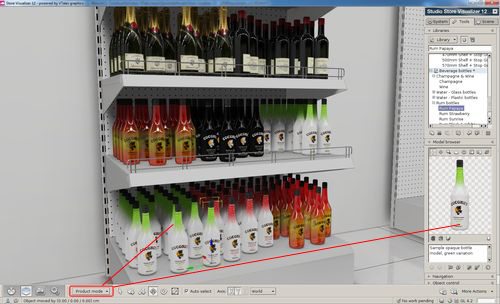 |
Once you are satisfied with the placement and configuration of your shelves, enter product manipulation mode. This is the standard mode allowing you to place and interact with products on shelves.
Enter Product manipulation mode by pressing the button on the toolbar or by selecting a standard model in the library and enabling creation mode.
Enabling this mode will automatically freeze all shelving, so to not interfere with your product interaction. It will also automatically re-enable physics, which were disabled during store and shelf construction.
|
| |
|
|
|
| |
|
| |
|
| |
|
| |
|
|
|
© Copyright 2018 VTales graphics - All rights reserved.
|